
Date: August 4, 2017
Author: Mike Mosley
Editor’s Note: As of January 2022, iland is now 11:11 Systems, a managed infrastructure solutions provider at the forefront of cloud, connectivity, and security. As a legacy iland.com blog post, this article likely contains information that is no longer relevant. For the most up-to-date product information and resources, or if you have further questions, please refer to the 11:11 Systems Success Center or contact us directly.
Now that we have replicated all of our servers and created a failover plan, it is time to test our failover process. There are several items you will want to test and verify before a real disaster strikes, such as network access, application functionality, and data integrity. The best way to ensure the DR environment will operate as expected during a disaster is to periodically run a failover test of your replicas. Previously, we discussed the considerations and differences between a full failover and partial failover with Veeam. Now we will walk through the technical process of starting a failover in both instances as well as failing back to production.
Performing a Full Failover with the Veeam Failover Plan
Testing a failover plan is the best way to simulate a full-site disaster on your end. The replica servers will power on in the 11:11 DR environment, and the Veeam NEA will enable your NAT rules if you do not use your own firewall. In this case, there is no communication between the production and DR side, so all access would be granted through the failover plan’s NAT rules. Running the failover plan does not impact production in anyway and all changes are erased once the failover is undone.
-
- It is helpful to disable any replica jobs to 11:11 during a test failover. This prevents unnecessary failures or incomplete snapshots if a job runs while the server is failed over.
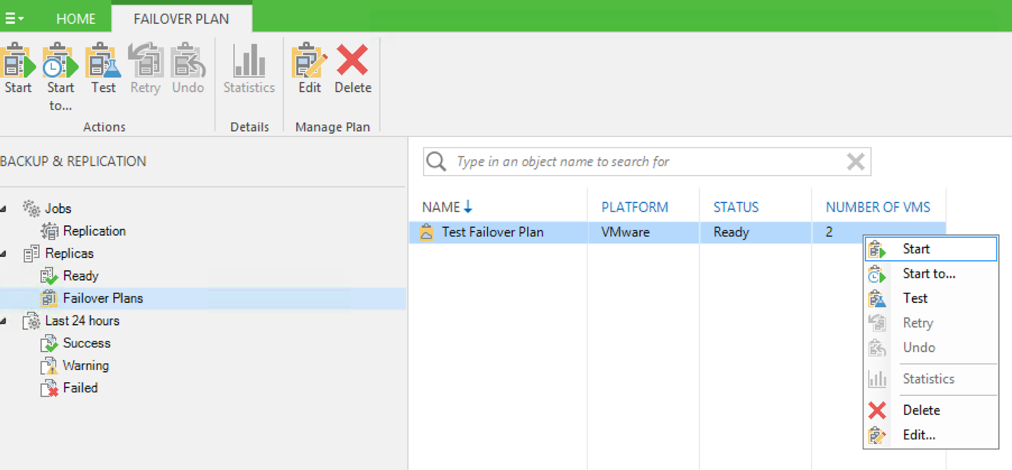
- In the Veeam console, under the Backup and Replication tab, select “Failover Plans.” Alternatively, you can start a failover plan in the Veeam web portal. The link and credentials to that will be provided by the 11:11 Cloud Services team.
- Right-click the failover plan you wish to test and select “Start.” You can also select “Start To,” which allows you to pick the most recent checkpoint from a given time. For example, start to the most recent checkpoint from 7/20/2017.
a. There is also a test option in this list. The test function powers up the servers and does a heartbeat test. Once the test is complete, Veeam shuts the servers down and ends the test. This is typically pretty brief and does not allow actual access to the servers.
-
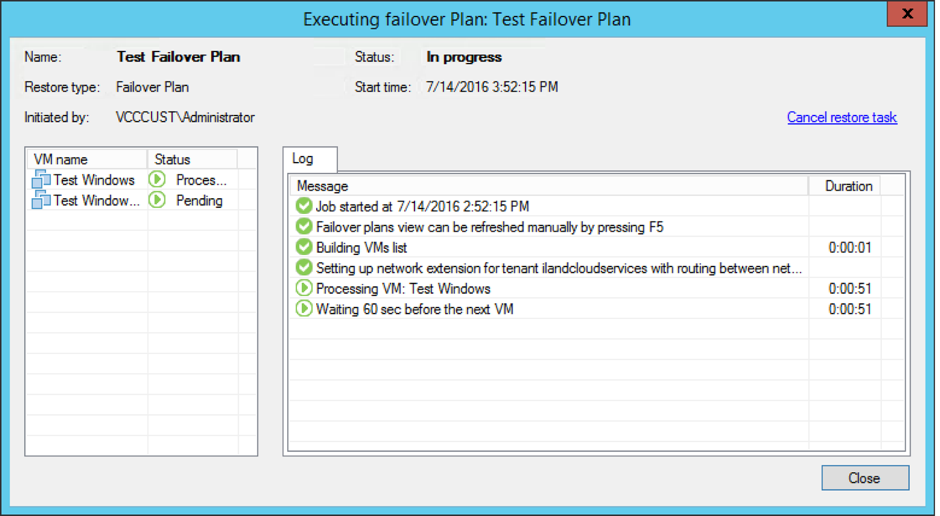
- After selecting start, you will see the Veeam statics popup showing the status of the failover.
-
- Once the failover plan is complete, all servers should be powered on and running. Keep in mind that it may take a few minutes for specific services to start, such as IIS.
- At this point, you should be able to access the servers through the ports you have configured in the failover plan (for example: HTTP/HTTPS, SSH, RDP).
a. If you are unable to access any of your servers or notice any other issues, please feel free to call or email the 11:11 Systems Support team.
-
- To undo the failover plan, you can right-click on the failover plan in Veeam and select “Undo.” This will power off the replica VMs and set the servers ready for replication again.
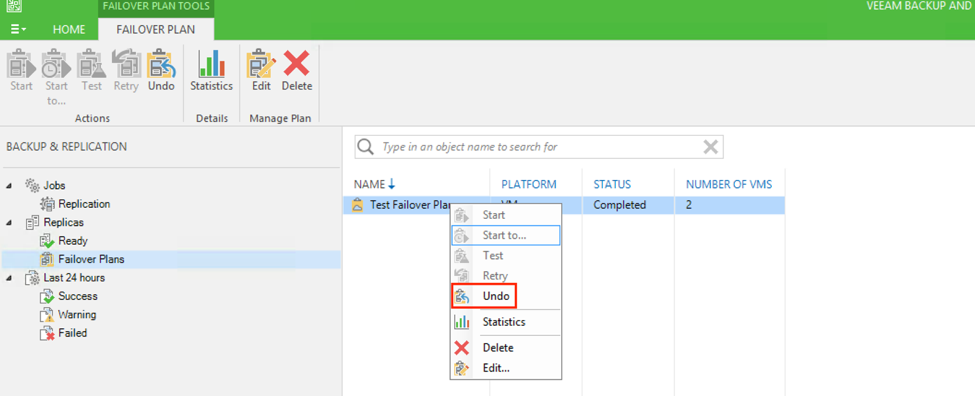
- Once the undo failover operation completes, the replicas will be ready for replication again. All of the changes made to the servers during the failover will also be erased when you undo the process.
Performing a Partial Failover in Veeam
You may just need to test the data or functionality of one particular server. This can be done with a partial failover within Veeam. If you are using the Veeam NEA, you do not have to make any networking changes, as the appliances on both ends create a Layer 2 bridge. So, the server you failover will be accessible internally from the production side. Keep in mind that this may cause some issues when accessing the replica server if the production server, with the same IP and hostname, is still online. In these cases, it may be best to change the IP, or disconnect the production server temporarily while you test. In the case of a live server, this is usually not an issue as the production server would either be powered off or already inaccessible.
-
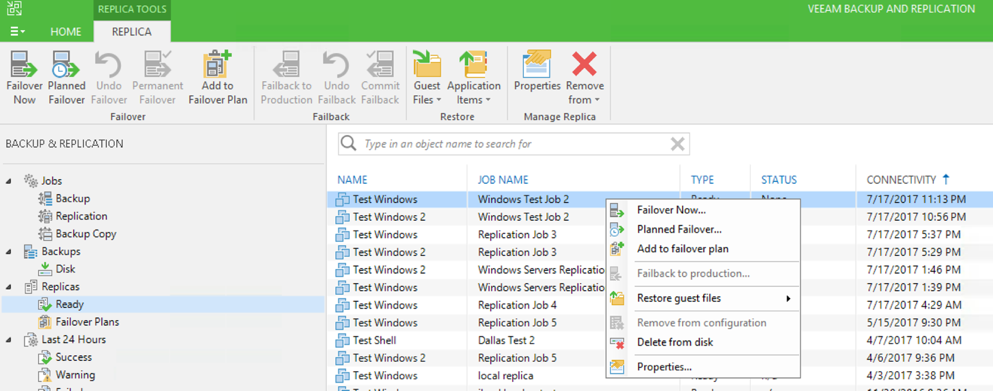
- In the Veeam console, under the Backup and Replication tab, click the replicas icon in the left-hand navigation.
- Right-click the server you wish to failover and choose “Failover Now.”
Keep in mind that partial failovers can only be started from your Veeam console. Individual replicas are not able to be failed over from the Veeam web portal or the service provider side.
- Once the failover process is complete, this server should be accessible internally from the production end. Keep in mind that since the failover plan was not used, the NAT rules created within the plan will also not be in use.
- When testing has completed, you can right-click on the replica server again and choose to undo the failover. Like the failover plan, when the undo operation completes, the replica is ready for replication and any changes made during the test will be erased.
Failback to Production
When failing over servers in a live disaster scenario, you will most likely need to failback to production. Because the undo operation erases all changes made on the replicas, we will want to avoid using that after a real disaster. When performing a failback to production, Veeam will set up reverse replication from the 11:11 DR site back to your production environment, and then failover back to your site. This process does cause downtime as both servers will be down during the failback process. It is best to schedule this process during a maintenance or outage window.
-
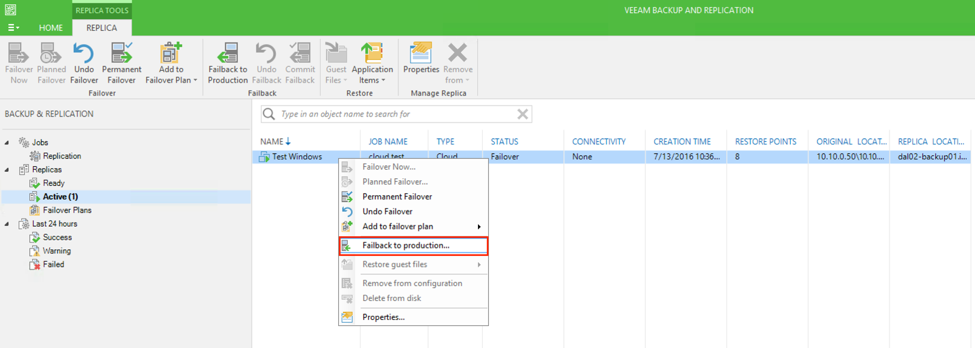
- In the Veeam console, under the Backup and Replication tab, click on the “Active” node, which will be located under Replicas.
- This should show your replicas that are currently failed over. You can select one, multiple, or all servers, and click “Failback to Production” at the top or right click the replica and choose “Failback to Production.”
-
- In the Failback Wizard, you will confirm and select the servers you wish to failback. Check each server to failback and click “Next.”
- On the destination page, you will need to configure the destination at the source production environment.
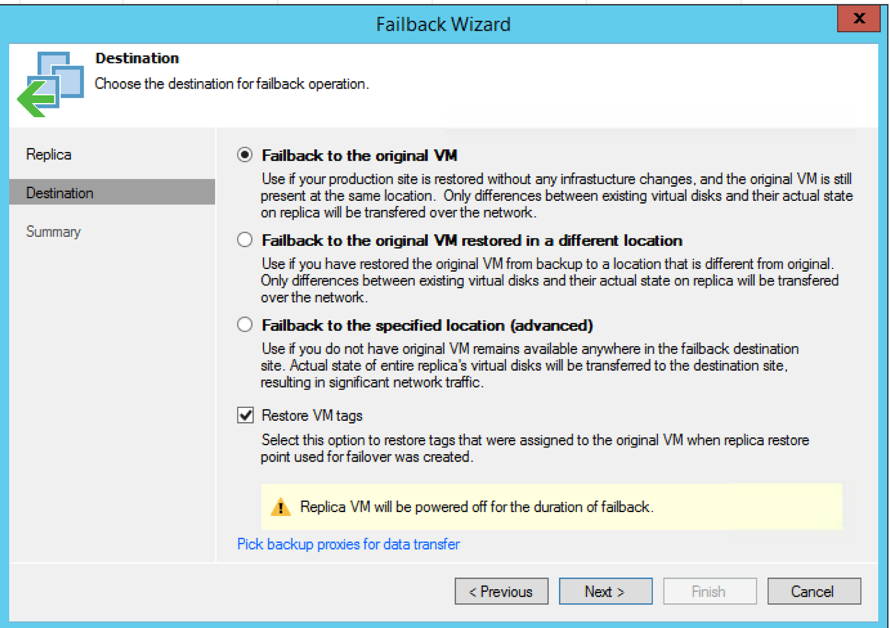
a. Failback to the original VM: This will set up the server that was failed over at 11:11 Systems to replicate back to the production source environment using the original server as a seed. This means that the original server on the source side will be powered off if it is still powered on and the server at 11:11 will overwrite the data on this server. Once the process is complete, the original source server is replaced by the failback server with all the changes made while at 11:11 still intact. During this replication, Veeam will only replicate the changes made to the server that was powered on at 11:11.
b. Failback to the original VM restore in a different location: This option is used if your vCenter infrastructure was changed during the failover event. If the hosts or data stores had been removed from your vCenter environment, or if the resource pools have changed, this option allows you to select the new hosts, data stores, or resources pools that are in use. This option will overwrite the original server and use it as a seed the same way it does on the first option.
c. Failback to the specified location: This option can be used if the original source server was completely removed from your environment. You can also use this option if you wish to failback the target server without overwriting the original server. You will need to specify the host, data store, folder and resource pool to be used for the replica. Please note that this option does require the server at the 11:!1 side to perform a full replica of the server since it is not using the original server as a seed. You may also want to leave this server powered off or disconnect the NIC once the failback is completed to avoid any IP or hostname conflicts.
- If you are specifying the location, you will need to select the target data store, host and other information for the source environment.
- Once you have everything configured to your preference, you can click “Finish” on the summary page. You will also have a checkbox to automatically power the server on once the failback is complete, or leave it powered off.
- Once the failback is initiated, you will get the status of the reverse replication. Veeam will power off the replica server at the DR site, and you will need to ensure the VM on the production site is powered off if it still exists. With both servers powered off, the failback can occur without any new changes being made that would not have been replicated during the reverse replication process.During this time, it may be wise to undo any other changes made outside of Veeam during the failover. These may be DNS changes or any changes to user access while running on the DR site.
- Once the failback operation completes, the replica server at the DR site remains powered off and ready for replication again.
As mentioned previously, it is a good idea to inform 11:11 of any live failover events. The 11:11 support team and engineers will ensure that your recovery environment is running as expected and will continue to monitor everything during the failover. We can also work with you to strategize and plan the failback operation for your production environment and ensure that it completes without issues.