 Editor’s Note: As of January 2022, iland is now 11:11 Systems, a managed infrastructure solutions provider at the forefront of cloud, connectivity, and security. As a legacy iland.com blog post, this article likely contains information that is no longer relevant. For the most up-to-date product information and resources, or if you have further questions, please refer to the 11:11 Systems Success Center or contact us directly.
Before you can start replication to the 11:11 Cloud, you will need to complete a couple of installation and configuration tasks with Zerto to prepare your environment. The installation process is typically seamless and quick, and the 11:11 Systems team is always available for any assistance needed. Please see the guide below for more information and best practices when configuring your Zerto infrastructure.
Installing Zerto on your ZVM Server
The first step for the Zerto installation is to download and extract the Zerto installer to a Windows server that will function as the Zerto Virtual Manager (ZVM). The main requirement is that the ZVM is installed on a Windows 2008 R2 server or higher. However, it is recommended that this server is not the vCenter server. Ideally, this server should be dedicated to just running the Zerto services if possible. The goal is to make sure there are no extra loads or services on this server that may impact the performance of any Zerto processes. You should also make sure that this server is able to log in to your vCenter infrastructure.
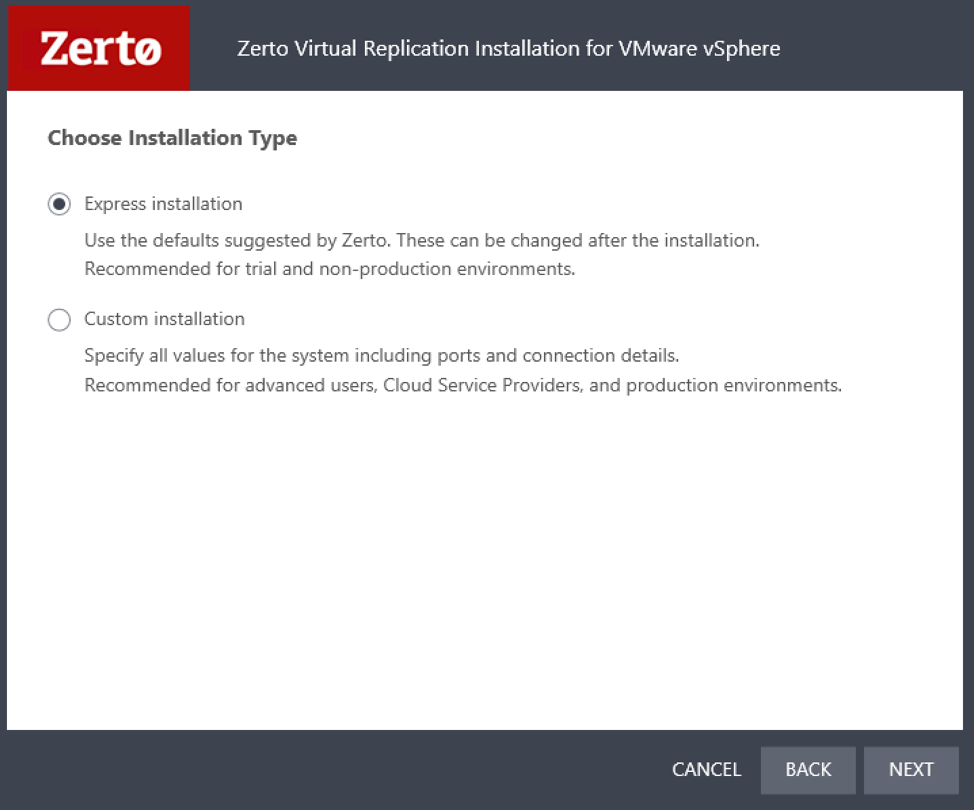
Once you have the Zerto installer downloaded and extracted, go ahead and start the installation. The first window will be an intro to the Zerto installation wizard. Click “next” to continue the installation. Accept the license agreement and click “next.” Then, you will select the install folder for Zerto. Typically, you can just leave this to default. Click “next” to continue. Use the Express Installation method, as we will not need to make any changes to the default ports or configuration.
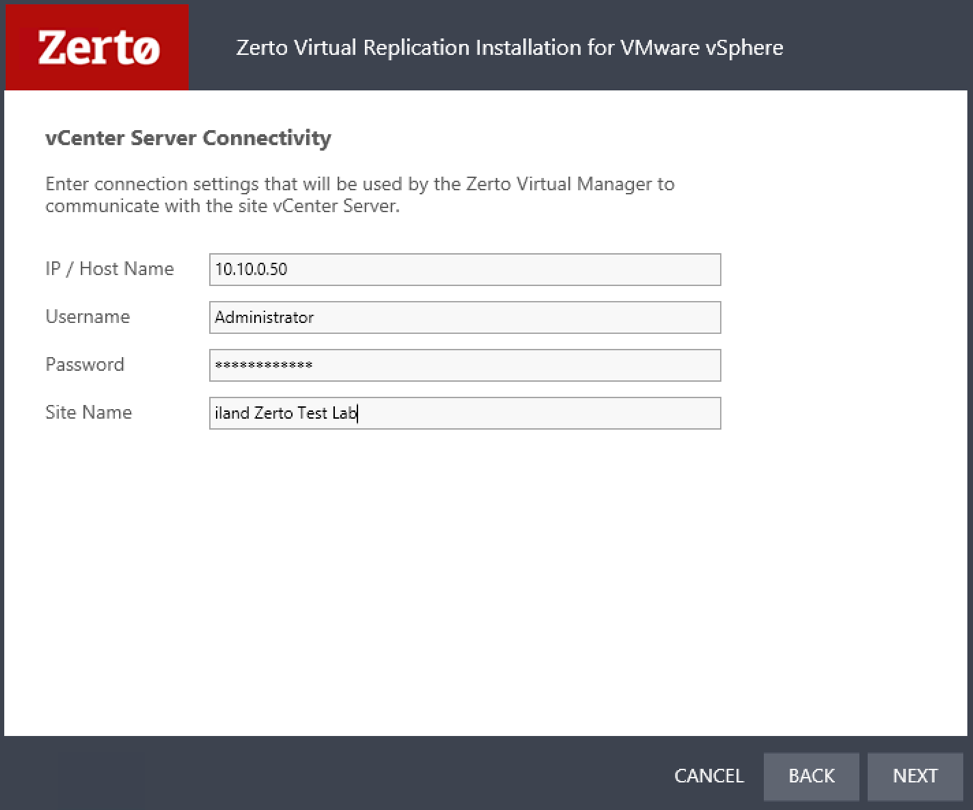
Click “next” to open the vCenter connectivity page. On the vCenter Server Connectivity window, you will need to input the vCenter IP or hostname, username, password and site name.
- The vCenter IP or hostname will be the same one you use when logging into the vSphere client.
- The username and password can be any user that has authoritative access. Once installed, you will have the ability to add users and permissions through the vCenter user settings.
- The site name is the name given to your site. You can set this to something like “[Company Name] ZVM.” This will only act as a label for your site in the Zerto GUI.
Once you have this filled out, click “next,” and Zerto will run a few checks to verify vCenter access and that the required ports are open. When that completes and all checks succeed, click next to begin the actual installation. Once the install completes, you will see the summary screen. You can click the checkbox to open the Zerto Management Interface.

You are also able to access this interface by going to https://[zvm.internal.ip.address]:9669. For instance, if your ZVM is on IP 10.10.0.200, you can access https://10.10.0.200:9669 from any server on the same network to access the Zerto GUI.
After logging into Zerto for the first time, you will need to pair to the 11:11 infrastructure. Click the Radio Button that says “pair to a site with a license.” This will connect your ZVM to 11:11 and the IP to use (usually 172.16.12.2) will be confirmed and given to you by 11:11 during the deployment phase.

VRA Installation
After pairing to 11:11, you will need to deploy the Virtual Replication Appliances (VRAs). You will need to install a VRA on each host that has VMs you wish to replicate to 11:11. In order to install the VRAs, you will need to ensure SSH is enabled on the host and have the host’s root password available as well as an available IP address. You may have a host or cluster of hosts that only hold development or testing servers. If you do not wish to replicate these servers, you do not need to install a VRA on those hosts.
In Zerto, click on the setup tab, which should show a list of hosts in your vCenter environment.
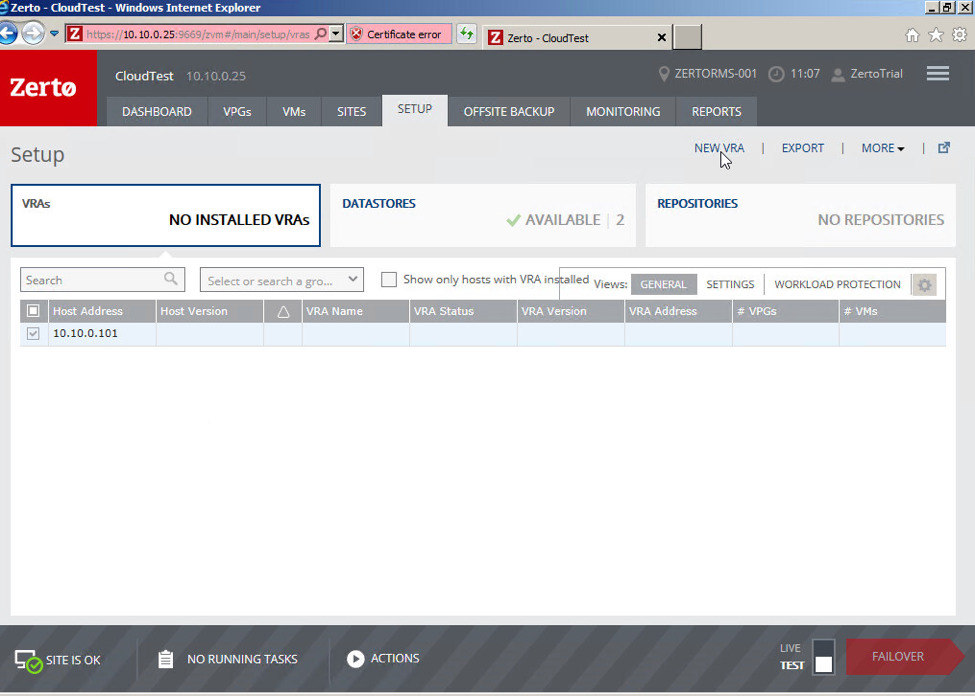
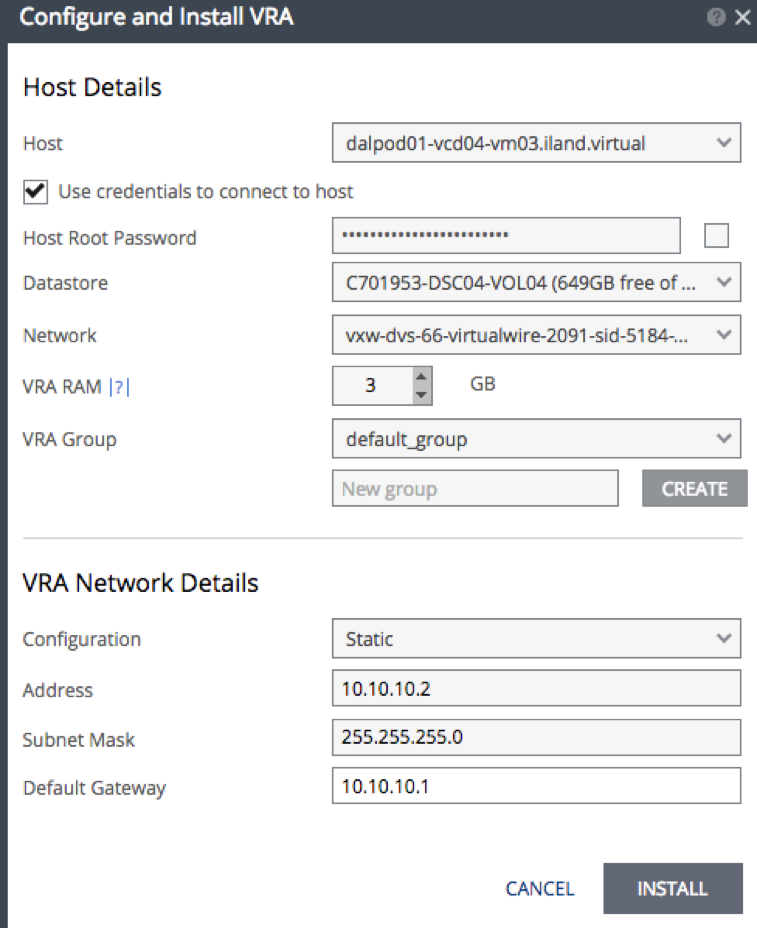
Check one of your hosts that you wish to install a VRA on. You will only be able to install one VRA at a time, so you will only check one of the hosts. Click the “New VRA” button in the upper right-hand portion of the screen. This will open the VRA installation window, where you will need to configure the settings for the VRA server.
- Check the box to “Use credentials to connect to host”
- Host Root Password: root password of the host
- Datastore: You can select any datastore that is available and has enough free space, including local storage. **Each VRA will use about 12GB**
- Network: the network to assign the VRA on. This will likely be the same network that the hosts are on and will need to have access across the replication VPN to 11:11
- Amount of VRA RAM: This is the amount of RAM to be reserved for the VRA from the host. Best practice is to use 3GB to start.
- This amount will be reserved from the host. If you have a larger environment, this may need to be increased.
- VRA Group: Do not change anything here.
- Configuration: Allows you to configure a Static IP or use DHCP
- Address: Static IP to be assigned to VRA
- Subnet Mask: Subnet mask of the network the VRA is on
- Default Gateway: The default gateway of the network the VRA is connected to
Ensure that the VRA installs successfully. In your vSphere client, you should see the new VRA deployed on the host. Zerto uses VMware affinity rules to ensure this VRA always stays on this host. When all VRAs have been installed, you will be ready to start creating VPGs. In my next blog, I’ll be focusing on best practices for creating VPGs.